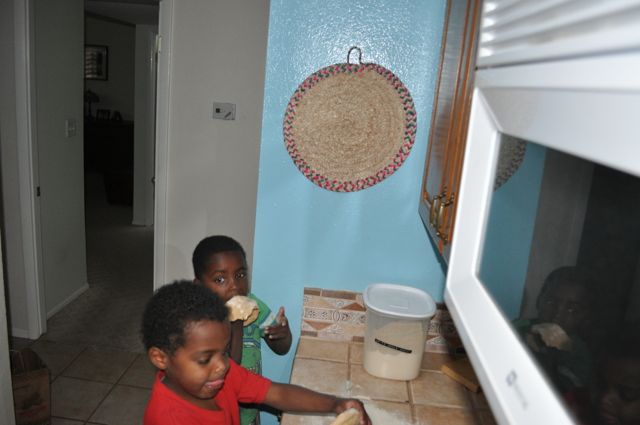
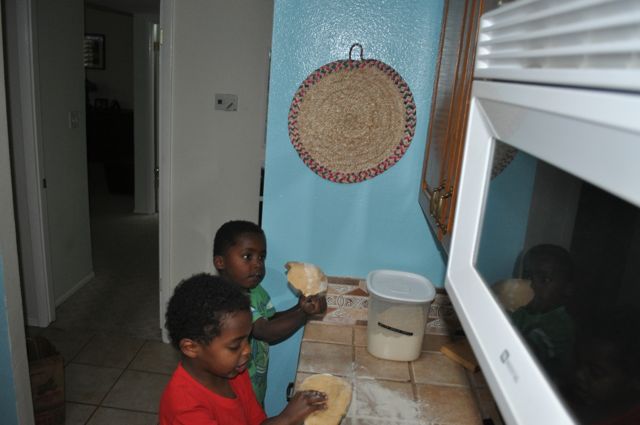
I try to let the boys help me in the kitchen. It isn’t easy for me, it requires a lot of patience and more planning than I’m used to, plus the kitchen gets even messier than when I cook (and I am a messy cook!).
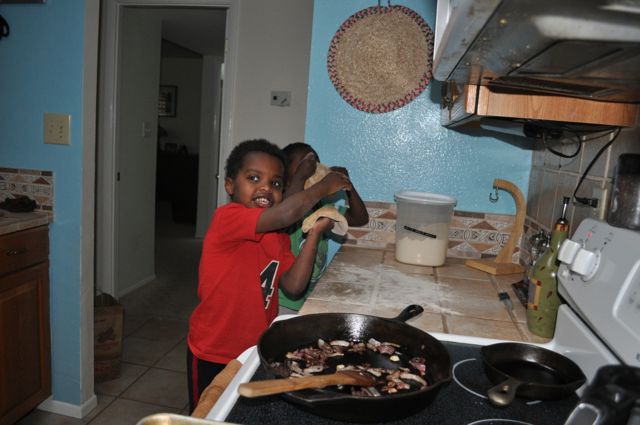
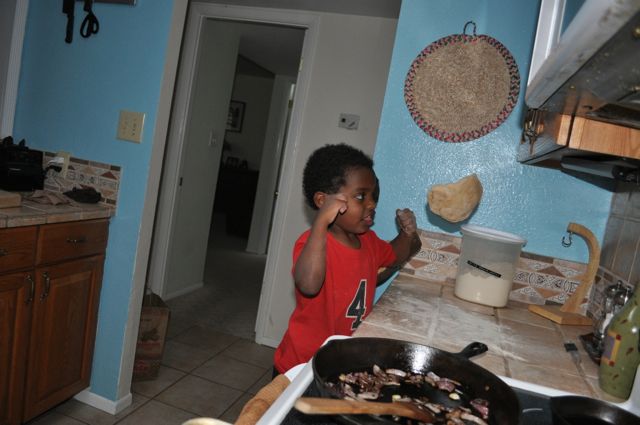
They really enjoy cooking though. Making homemade pizza was right up their ally! They loved making the dough, smelling it, feeling it, tossing it, tasting it. They also added their sauce, cheese and toppings but for some reason no pics of that part.
Yep Ez tried the raw doughEz tossing his doughSo much fun!Noah’s dough in the airMessy boy
If you are like me, you love to find new yummy recipes to try. I find most of my new recipes from other people’s blogs. Apparently we all really like to talk about food, or just the people I follow do.
For the longest time I had no idea how to successfully organize the online recipes so I could find them when I wanted, I just had a folder on my hard drive that was a jumbled mess. I didn’t want to print them, because well then I would just have a jumbled mess of papers (okay I actually have several three-ring binders for this purpose, but was tired of wasting paper and organizing it). Enter my super, amazing husband who introduced me to Evernote. You can easily save, tag, make notes, and search recipes (okay it isn’t just for recipes that’s just my primary use). The best part it is FREE! It can cost money if you want to pay to have more monthly space, but really it isn’t necessary.
Do you want to see how easy it is? I took a few screen shots to show you. Just click on any of the images to see the picture bigger.
Highlight what you want to save, you can save the whole page if you want, but that takes more space.
Push the elephant on your browser, I have Safari.
How it now looks in evernote
How it looks after I have changed the title and added the tags I wanted
Searching for something for dinner.
The sidebar where you can have different notebooks to organize whatever you want.
My someday dream is to have all my recipes in evernote, no more three ring binders. I can either scan them in and add them or type up short ones.
Evernote is backed up online, so I have no fear of losing my recipes. You can easily delete ones you don’t like, or make notes on what you want to change. It is super easy and I LOVE it!
9:40 am and out cold! Noah getting surprised. Can you now guess why Noah was surprised? Noah getting squirted. Now getting squirted by himself. They made themselves a mud-hole. I'm all wet and muddy, can I please get in your lap? Again?!? I can't tell if he loves or hates it, because he gets mad, but then he keeps doing it. Ezra seeing if mommy is telling through truth when she said that was ouchie. Carter's new spot, underneath the play structure. Grandpa and a laptop, what could be better? Ganging up on him of course! A boy and his (neighbor's) laptop! Ez knows what he wants. Helping clean up the oil slick he caused. Mom do we really have to wait for them to cook?
I love sweet corn, love, love it! It is one of my favorite things about summer. I had the opportunity on Friday to go pick organic, sweet corn for a ridiculously low price. I was allowed to pick three dozen so I did. I read up on how to freeze it here, and learned a terrific way to cut it of the cob here.
I spent a little time yesterday afternoon preserving some of it.
Here it is getting blanched.
Then dunked in ice water.
Then de-cobbed. Everything I read said not to freeze it on the cob. Cutting it off was much easier than I anticipated and the upside down bowl in a larger bowl trick was very helpful.
Ez woke up from nap right as I was starting the process, turns out the boy loves corn on the cob.
Daddy showing him proper technique.
Wouldn’t put it down to color.
Noah did not share his brother’s love for corn on the cob, but he did eat plenty that I had cut off the cob. I think Ezra ate three ears of corn all by himself.
I love cooking, I love it more now than I ever thought I would. Yes there are nights I don’t want to cook dinner, but once I start the process my mood usually improves. I had never had Ethiopian food before we decided to adopt from Ethiopia. I quickly found out I love it. It is now tied with Mexican as my favorite food. I had put off learning to cook Ethiopian food for far too long. I had built it up in my head as an impossible task, yes injera is not so simple and I need work in that area, but other than that it is like cooking any other food, just different spices.
I am so glad I finally started trying to cook the food. The other night I made two dishes one was bland and I probably won’t ever make it again, just wasn’t really my taste, and the other was SUPER spicy. Like so spicy I was sweating from every pore in my body, but it was also very, very YUMMY. Matt went back for seconds even though he is not a SUPER spicy food eater. The next night I made another half recipe without the berbere so I could combine what was left from the first night with it. The result was the perfect amount of spice for us.
Yemisir Kik We’t
Ingredients:
2 cups split lentils (there are 4 cups in the picture, I was making two different recipes with lentils)
6 cups water (boiled)
2 cups red onions (chopped)
1.5 cups oil (I later learned this was a spiced oil that I should have made ahead of time, I just used olive)
1 Tbsp. ginger
1 tsp. garlic (I just used a clove)
1 cup berbere (I thought I was smart and only used 3/4, haha still too spicy)
1/4 tsp. cumin
The ingredients for both of my dishes
Preparation
Wash lentils and boil for 5 minutes (until the lentils are tender). Cook onions adding oil and stirring gently until golden brown adding a little water as needed (I didn’t see a need with all that oil!) to prevent sticking. Remove lentils from heat, drain and reserve water for later use. Add the lentils to the onions. Add reserved water stirring to prevent mixture from sticking to the bottom of the pan. (the second night I was lazy and skipped draining the lentils and just added it all at once) Add everything else. Simmer for 20 minutes. 6 or more servings.
Helpers being silly
Uh-oh the helpers are done!
Noah on the second night decided he was just join in on the fine, he was so mad when I wouldn’t let him stick his spoon in my pot.
Clean teff thoroughly by removing all foreign materials , grind to a fine powder (mine was flour already, so I skipped.) Sift into a deep mixing bowl. Adding water gradually and rubbing with the fingers to avoid lumps, make the flour into a dough.
In a large pot dissolve yeast in warm water and add the flour mixture and mix. Leave covered for 2-3 days until fermentation begins and water rises to the top. (I waited until the whole top layer was water, only took 2 days) Carefully discard the water. Boil 2 cups of water. Take 1 cup of the mixture, put in the boiling water (Abseet’). Place on a warm stove and stir continuously until it becomes thick (maybe 5 minutes). Cool and pour back into the original pot. Add more water (??? how much, I had no clue so I added a little at a time until it became more like runny pancake batter), cover and let stand till the mixture rises (doesn’t ‘rise’ like you expect bread dough to rise, mine just started to get all bubbly again).
Preheat pancake pan at 420° (I borrowed my neighbor’s electric skillet, and we ended up folding it closed and heating from both sides). Take 3/4 of the mixture and pour into the pan slowly, starting at the edge, going clockwise, in circles and coming to the center. Cover pan 2-4 minutes. When ready, the rim of the injera will rise from the pan. Remove immediately and place on a clean cloth to cool. Injera can be covered and stored in a cool place or refrigerated for about 2-3 days. Makes 6-8 servings.
Tomorrow is our Family Day and I am making Ethiopian food for the first time (hope it turns out!). I am looking forward to adding Ethiopian food to our meal rotation, we all love it, plus it is easy to make vegetarian or vegan.
Tonight we made the injera (a spongy bread made from teff that you eat the food with). Injera is actually a couple day process because it has to ferment, mmmm fermented bread, tasty.
Here it is fermenting, lovely no?
I started the process Saturday morning and didn’t have to do anything else until today. A few of the instructions in the cookbook I have were a little iffy, but I kept going.
All done fermenting ready to cook! (I think)
Matt helped me cook it because he is the better pancake cooker of us.
"helping"It's not pretty, but it will do
The injera turned out for the most part. It is definitely the right consistency and texture. It is a little tangier than what we are used to, don’t know if it is the type of teff we used or the fact that the restaurant we frequent also mixes in wheat.
Cooking with a smile
I am sorry I waited so long to finally try. It really wasn’t all that bad. No it isn’t as good as in Ethiopia or at the restaurant, but it is edible and great for our first try.
Summer gardening season is upon us and if you planted zucchini you will more than likely have more than you know what to do with. Recently another gardener gave me about six pounds of zucchini and I’ve been working my way through it. I thought I would share a couple of recipes we really liked.
Black Bean Zucchini Quesadillas I didn’t have green onions or jalapeno so I made a couple of changes. First, I sautéed half a yellow onion with a clove of garlic (I could have used the whole onion). Second, I put in some cumin and cayenne pepper. Other than that I made it as is. It made more than enough for our family, so I froze the rest. I reheated one today for my lunch in the toaster oven and it came out great. 🙂
Lemon Zucchini Bread There is a bounty of zucchini bread recipes. I chose this one because it used less sugar than zucchini, a lot of them used more. I made a couple changes to this one too. First, I used half whole wheat/half bread flour. I only used the bread flour because I have a ton of it, I would normally just use all purpose. Second, I used half brown sugar/half white. Third, replaced the vegetable oil with applesauce. I also doubled it and made muffins too, the boys loved it.
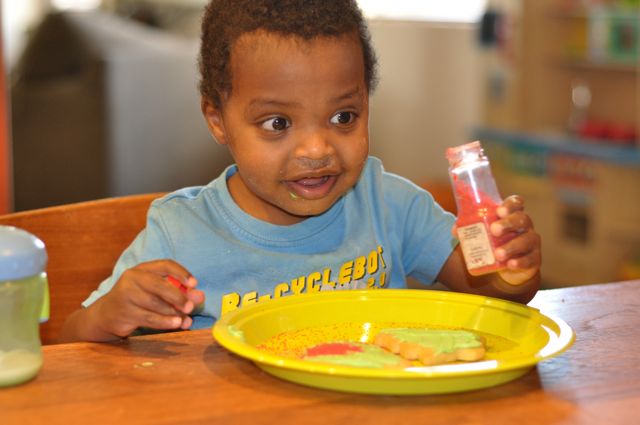
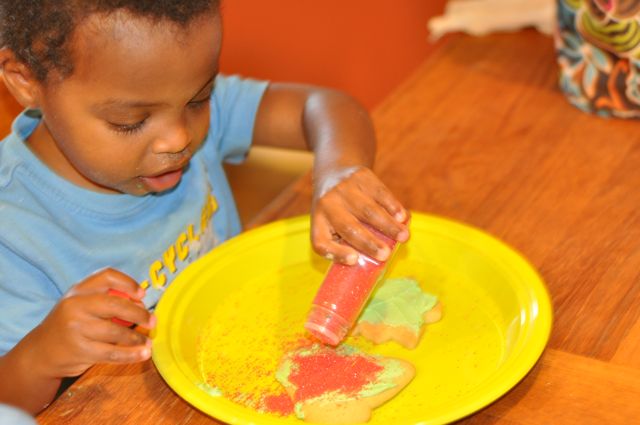
Yesterday I decided to let go of control, the control I had because I still fed the boys their breakfast and lunch. I decided it was time they could feed themselves. They’ve been feeding themselves dinner for a long time and I had been resisting letting them feed themselves the rest of their meals. Today I decided to just rip the band-aid off and let them at it. Well they loved their new independence and did really great, plus ate plenty of food.
Here they are enjoying breakfast:
and lunch:
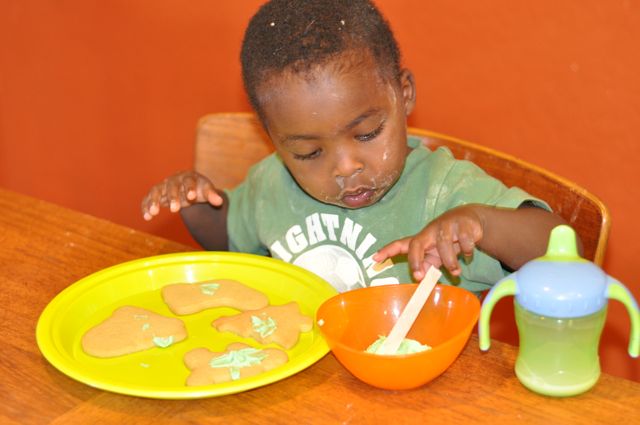
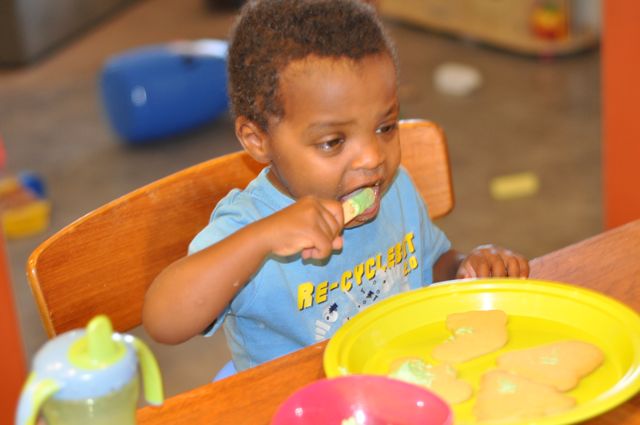
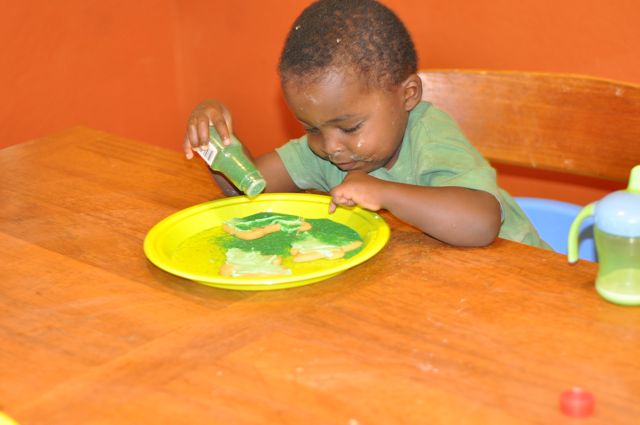
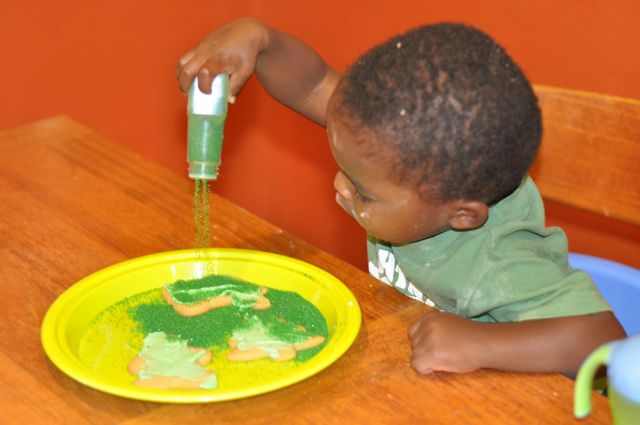
We were having so much fun with our new independence we decided to try out our booster seats and sit at the table for snack:
We also ate dinner this way. All four of us at the table, it was nice. 🙂 Plus not having high chairs in the kitchen frees up some space.
What you’re not familiar with that saying? This morning I woke up ready to can black beans for the first time. You see we eat a lot of beans around here and I am concerned about feeding too much BPA to my little cuties. I am sure in very small amounts our bodies could rid us of BPA, but it seems to be found in more and more stuff, so I try to eliminate when possible. I cook from scratch for the most part, but having a can of beans on hand is so convenient, easy way to add protein and so yummy. I own a pressure canner, so I thought why not? Its actually not that difficult but when you make a few mistakes (like someone did this morning) it can be more of a task than anticipated.
Mistake #1
Assumed my children would sleep to their normal wake-up time and I would have the beans in the canner before hearing a peep from them.
Being entertained in their highchairs by whisks. I was moving a pot of boiling water and didn’t want to risk an accident.
Mistake #2
Left beans on stove (waiting to boil) and went and dressed two adorable little boys. I came back to the biggest boil over I have ever had, my entire stove-top was covered. I guess I am lucky that I got there before it started running down the sides.
Mistake #3
Not reading my pressure canner instructions before starting. Yes I have used it before and get most of it. The mistake I made, I just KNEW it fit 7 quart sized jars, reality it fits 5 quart sized jars. (meaning I had about 4 store bought cans too many of beans to can)
Mistake #4
I did an extra step, yep more work than necessary. I sterilized my jars, but for pressure canning you only have to wash not sterilize.
My giant mess, see my water bath canner on the left? Totally unnecessary, I only got it out to sterilize the jars.
Despite all my mishaps, I am still happy with the results. I now have 5 quart sized jars of canned beans (equal to 10 cans) and a large batch of this hummus and an idea for dinner. I chose quart for black beans because most recipes I use call for two cans.
The finished product!
Ez using my apron as a cape. Wouldn’t you want to protect these cuties?
The boys are (thankfully) still at the age where pickiness hasn’t yet developed. I am hoping to head off some of the toddler pickiness by adding lots and lots of variety now. They do have some food items they clearly love more than others, some healthy (oranges, carrots, sweet potatoes, applesauce) some more questionable (pizza, graham crackers, bratwurst). I wanted to add more fruit variety to their diet, and knowing how much they love applesauce, I knew it was a good place to start. I also didn’t want to spend every day peeling and dicing fruits, I do plenty of food prep around here and didn’t want to add too much more, plus when they are hungry they are HUNGRY. So I purchased a whole bunch of frozen fruit and spent about 30 minutes one day (with toddler help) and pureed it all up and placed it in these handy freezer containers, wrote on some removable labels, and presto I have lots of easy to grab pureed fruit to add to applesauce or anything else, like say yogurt (currently they aren’t eating). I also add a little whole grain baby cereal to the applesauce. It makes for a yummy, healthy treat.
I promise not all our NaBloPoMo posts are going to just be quick photos and videos, but I will say those are so much easier right now! I have a lot I would like to share and get out of my head, but most days my brain is mush. Noah and I making some baby food not long after arriving home from Ethiopia
I decided to make all the boys baby food even before we brought them home. I just couldn’t stand the thought of all those little glass jars, plus I figured it would save us money. I honestly have not kept good records of what we have spent so I cannot do an accurate cost analysis. I would like to think it has saved us money. We did buy jarred food once for a picnic and thought the consistency was weird. The boys ate it just the same though.
Why making our baby food works for me:
1. I love to cook and it is one of the ways I love to show the men in my life my love. I only had Matt to feed for 7 years, it is nice to have two new men to feed!
2. I do not like packaging, I couldn’t deal with throwing away/recycling all those jars and containers.
3. I like to eat organic, local, and seasonally, much easier to do if I just go to the farmers’ market and make the food.
I received a good book recommendation from a friend, “Super Baby Food.” I purchased a used copy for cheap and I love it. While the author can annoy me at times, she really likes the term super and she seems super proud of herself, I still love the book. It has lots of tips, recipes, and information on all sorts of veggies and fruits. She also has recipes for the toddler years, it is nice to have something that lasts beyond the baby years. I am going to try some of her cracker recipes soon and will share if it is worth it. I don’t do everything she suggests, in fact I haven’t even read the entire book. I got it right before we left and have been busy with the boys since we returned home, so I always just turn to exactly what I need. Ezra enjoying something yummy
I cook most of our baby food in my solar oven, but she gives you cooking directions for each food at least three ways, microwave, steamer, and oven. I use her food cube method to make large batches and freeze so I am not constantly making food. We go through a lot of food around here!
I would like to address a couple of the bad reviews on amazon, because I always read the bad ones before making a decision.
1. She promotes a vegan menu for babies. She does not, she does promote a vegetarian menu for babies, which was fine with me, because I was only planning on introducing meat once they were eating what we were eating and since we don’t eat meat often this was a good approach for me.
2. She introduces allergy foods too early, yep sometimes she does, but she does have a short chapter dedicated to allergies and does encourage you to talk with your pediatrician first.
3. One reviewer thought she was not breast feeding friendly based on the food serving suggestions. She is not against breast feeding and suggests you serve your baby the amount of food they can eat. She does say to feed them their meals with bottles and give them snacks. I decided to feed the meals and bottles at least an hour apart and thus did not have to feed snacks. She also states the amount of breast feeding/formula drinking they should be doing and if it drops when you push solids to cut back on the foods so they get enough breast milk/formula. My boys drank 30 – 36 ounces a formula a day until about 10.5 months when they naturally started wanting less bottles. Noah eating avocado
I feel with any book or recommendation with child rearing you look at it with an open mind, discuss with your pediatrician, and then decide what works for your child. Not every single suggestion will work for every single child/family. I understand making baby food will not work for every family, but for ours it did, and if you think it will work for yours, I highly recommend it. You get to avoid all those little glass jars and no preservatives.
Now for a typical daily menu at our house at 11 months old:
Wake-up – 8 oz Bottle
Breakfast – Whole Banana and 1/3 cup of prepared steel cut oats (each)
Wake-up from nap – 8 oz Bottle
Lunch – 1/2 cup of yogurt, 1/4 cup of fruit (apples/pears/peaches), and iron fortified baby cereal to thicken (each)
Wake-up from nap – 8 oz Bottle
Dinner – They snack on something while we eat, sometimes crackers or cheerios, but sometimes it is what we are eating. For their actual dinner they eat about 1/2 to 3/4 of a veggies (sweet potatoes, carrots, butternut squash) about 1/4 lentils and sometimes I sneak a green veggie in there!
Now that that we have transitioned from formula to whole milk, I will start giving them snacks because the milk doesn’t seem to hold them over as long. Since we don’t eat a lot of meat I will ask the doctor about iron supplements next week at our 1 year appointment. That’s it in a nutshell. Please feel free to ask questions!